Pow! Science! Experiments & Experigraphics - Volume 2

by Hema and Eric Bulmer copyright 2003-2020

Table of Contents

  1. Juice Box Jetpack!
  2. Like a Rollin' Soda!
  3. Grape Juice Chemistry!
  4. The BEST Diet Coke Mentos Experiment!
  5. Electric Water! (ADULT SUPERVISION REQUIRED)
  6. Ball Lifter!
  7. Up Against the Wall!
  8. Classic Slime!
  9. Lift Heavy With Light!
  10. Split a Penny in Twain!
  11. Crackling, Crowing Cup!
  12. I Hear a Hanger!
  13. An Egg-cellent Eggs-periment!
  14. Automatic Finger Washer!
  15. Cool Paper Cutting Experiment!
  16. Valentine's Day Glitter Fizzies! (Chemistry)
  17. Hot Wheels: Adapt Straight Track to Workshop Rocket Launcher
  18. How Long is a Minute? An Easy Activity to Develop a Sense of Time

Click here for More Experiments


Juice Box Jetpack!

Objective

To observe Newton's 3rd Law of Motion (Action/Reaction) in cool new way! This is a great experiment to perform after a snack!

Materials

  • Empty Juice Box
  • String
  • Water
  • Something Pointy
  • Something Sharp

Procedure

  1. Drink your juice.
  2. Fold the flap on the top of the box up. You may have to pry up the corner flaps also. Using something sharp, cut open the top of the juice box and open it right up like a milk carton.
  3. Using something pointy, poke holes in the top flaps of the juice box (see diagram).
  4. Using something pointy, poke a hole in the lower right corner of the front AND in the lower right corner of the back of the juice box. In the diagram, you can see the hole in the lower right corner.
  5. Pass the string through both top-holes and knot the string so that the box is hanging from the string — the top of the box should still be open.
  6. Bring water and your juice box-on-a-string and stand over a sink, outside, or over a container - somewhere you don't care about getting wet.
  7. THE TRICKY PART: TEAMWORK REQUIRED!One person holds the water in one hand and the hanging juice box (hold by the string) over the large container on the floor. The other person locates the two little holes in the bottom right corners of your juice box and covers them with their fingers.
  8. The person holding the water pours the water into the top of the juice box.
  9. The person covering the holes lets go!

What happens?

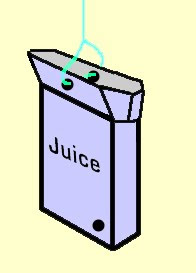
Water should shoot out of the holes and cause the juice box to spin until the water runs out.

What's Going On?

When you let go of the holes in the juice box, the water rushes out—that is a force. As the water leaves the carton, it pushes back on the carton with a second, equal force, just as the fuel burning out of a rocket propels it forward.

Think and Talk About This

Look carefully at where the holes in the bottom of the box are located. Are they on the same side? Opposite sides? Would this experiment work differently if both holes were on the same side of the box?


Like a Rollin' Soda!

Materials

  • Two unopened cans of soda
  • Inclined surface

Procedure

  1. Locate the inclined surface (If you're experimenting at home, stick a book under a board, or prop up two legs of a table or something).
  2. Teamwork required! One person stands at the raised end of the inclined surface with the soda. This person is the Roller. The other person stands at lower end of the inclined surface. This person is the Catcher.
  3. The Roller should carefully lay the cans on their sides on the starting line (at the raised end of the inclined surface). When you're sure the Catcher is ready, release both cans at the same time, and watch them roll. They should roll to the Catcher at about the same speed.
  4. Return both cans to the Roller. The Roller should now select JUST ONE of the cans, and shake it vigorously for about 10 seconds. Repeat step 3 (Roll the cans to the Catcher again).

What's Going On?

Wow! The unshaken can wins every time! This is because shaking the can knocks loose any bubbles sticking to the inner surface of the can. This causes the mass of the soda inside the can to be more evenly distributed throughout the can, causing it to roll more slowly. The unshaken can's soda is (just a little tiny bit) more concentrated around the can's axis of rotation (it's center), and therefore rolls a little bit faster.

Think and talk about this!

There is a famous demonstration using a stool with a spinning seat. If you have one, you can try it. Spin on the stool with your arms held straight out. While spinning, pull your arms in tightly to your chest. Your spinning-speed will increase quickly!! It's the same idea. The closer your mass is to your center, the faster you spin.


Grape Juice Chemistry!

Objective

To observe Grape Juice's natural ability to detect acids and bases.

Materials

  • Grape Juice (Juicy Juice works very well, even though it's not 100% Grape Juice)
  • Water
  • Baking Soda
  • Citric Acid Crystals (substitute vinegar if you don't have citric acid crystals)
  • Spoon
  • 3 Clear plastic cups or glasses (10-12 ounce capacity)
  • Paper Towels (optional, but handy in case of an overflow)

Procedure

KEEP TRACK OF WHICH CUP IS WHICH!

  • Pour about 1 inch of Grape Juice into an empty cup. Then add about an inch of water to the Grape Juice to lighten its color.
  • Pour about 1 inch of water into a different cup. Add a spoonful of Baking Soda to this water and stir until dissolved (or mostly dissolved).
  • Pour about 1 inch of water into your last cup. Add a spoonful of Citric Acid Crystals to this cup and stir until dissolved (or mostly dissolved). If you don't have citric acid crystals, pour 1 inch of vinegar into the cup for this step.
  • Pour the Baking Soda liquid into the Grape Juice and watch for a color change. Cool! Grape Juice detects chemicals that are "alkaline" or "bases" by turning darkish green-ish!
  • Next, pour the Citric Acid liquid into the darkish green-ish liquid. Whoa!!

Grape juice detects acids by turning a very light color! And as you may have noticed, baking soda and citric acid react in an exciting way also.

What's Going On?

Grape juice, like many other natural chemicals, reacts when different types of chemicals are mixed with it. Cabbage juice is another example of a natural acid/base indicator.

Think and Talk About This

Do you think toothpaste is an acid or a base? How could you find out? What other chemicals could you test with your Grape Juice indicator? With mom or dad's permission & help, design and experiment and try it out!


The BEST Diet Coke Mentos Experiment!

Kids and teachers alike seem to really enjoy our School Program: "Science Asks Why", but it's always the last demonstration that gets them the most excited, and although I certainly did not invent the famous "Diet Coke & Mentos" experiment, I most definitely have perfected it, resulting in round, brown spots on the ceilings of many Rhode Island Elementary School Auditoriums. After the program, I'm almost always asked how I get this particular demonstration to work so well.

I'll skip over the science behind why this experiment works at all, and tell you the simple secrets to getting a great geyser every time. Use these simple methods and you'll easily get 30 foot plumes of soda flying into the air (without any special restriction device screwed to the top of the bottle) to the delight of any kid (or adult) who happens to be watching.

The Secrets!

1. Use Diet Pepsi instead of Diet Coke. Odd, I realize, to perform the famous "Diet Coke & Mentos" experiment without Diet Coke. Truth be told, they both work - but I've used both extensively, and I consistently find Diet Pepsi to work just a little bit better - so why not use it instead?

2. Heat the Soda (without opening the bottle, of course). Get a nice big pitcher - a one gallon size is great - and put your unopened bottle of soda in. Then, fill the pitcher with the hottest water you can get to come out of your sink (DON'T heat water on the stove and use that, please! There's hot and then there's just too hot). Let that bottle sit in the hot water bath for a good twenty minutes and I guarantee maximum altitude.

3. Figure out a good, dependable delivery system to drop the Mentos into the bottle as quickly as possible. I use a Giant Test Tube (sometimes called a 'Baby Soda Bottle', but that's a whole different article). You might use one too, or you might use a rolled up piece of cardboard.

4. When you "blast off", do it from a table top, such as a picnic table. Or put the bottle of soda on top of a wall. Whatever, anything to get it launching from just a bit higher than the ground. Launching from the ground isn't bad, but if you want spectacular results, give yourself a height advantage! 3 feet higher is, after all, 3 feet higher! The more kids have to bend their necks to see the top of the plume, the cooler they will think you are.


Electric Water (ADULT SUPERVISION REQUIRED)!

CAUTION: THIS EXPERIMENT IS TO BE CONDUCTED ONLY WITH ADULT SUPERVISION!

Materials

  • Beaker, Jar or large glass
  • 2 insulated wires(ideally one red & one black, but use what you've got) each equipped with an alligator clip at one end (or with an inch or two of uninsulated wire at each end)
  • Water
  • Salt
  • Spoon
  • 6V battery

Procedure

PART ONE

  1. Fill the beaker with water until water is about an inch from the top (amount is not critical).
  2. Clip the end of the black wire to the NEGATIVE ( - ) pole of the 6V battery.
  3. Place the other end of the black wire into the water, so that the exposed end is fully submerged (bending the wire over the lip of your beaker/container will help keep the wire in there).
  4. Clip the end of the red wire to the POSITIVE (+) pole of the 6V battery.
  5. Carefully place the other end of the red wire into the water so that the exposed end is fully submerged.

What, if anything happened when you placed the second wire into the water? Nothing, right?

CAUTION: AT NO TIME SHOULD THE TWO ENDS OF THE WIRES IN THE WATER BE ALLOWED TO TOUCH. If they do, you're setting up a 'no load' or 'short' circuit and the wires and battery will begin to heat up.

PART TWO

  1. Disconnect the wires from the battery and remove them from the water.
  2. Repeat steps 2) through 5) from Part One, EXCEPT THIS TIME, first add 5 or 6 spoonfuls of salt to the water and stir until it is completely dissolved.
  3. 3) Allow this setup to run for several minutes.

Did anything different happen this time (if it didn't, add more salt - amount needed will vary based on the size of your container)?

What's Going On?

Despite its bad reputation from movies and TV, fresh water does not really conduct electricity well, as you observed from Part One of our experiment. When Salt is added to water, it dissolves into ions of Sodium and Chlorine, which conduct electricity very well indeed! The gross stuff that started to form in the water (starting out yellow and turning green if you watched long enough) is Sodium Hydroxide (also known as Caustic Soda or Lye), a major ingredient in soap!

Think and Talk About This!

Sodium Hydroxide is made of Sodium, Oxygen and Hydrogen. The Sodium comes from the salt. Where does the Oxygen and Hydrogen come from? (HINT: Think about the chemical formula for water).

Optional Method for Enhancing Results

To make the reaction a bit more noticeable, try wrapping a small strip of aluminum foil around the end of the black wire that goes into the water.


Ball Lifter!

Get This Stuff Ready

  • Marble
  • Rubber Ball (like a super ball, no more than 1 inch diameter)
  • Empty Spool or an empty toilet/paper towel roll (you'll need a longer string if you use a paper towel roll)
  • String
  • Tape

Do This

  1. Tape one end of the string to the marble (use plenty of tape to make sure it's secure).
  2. Thread the string through the spool, and then tape the other end of the string to the rubber ball.
  3. Even though the ball is heavier than the marble, you can use the marble to support and even lift up the ball by holding the spool and spinning the marble around like a lasso.

Up Against the Wall!

Get This Ready

  • A Paper Towel
  • A Partner

Do This

  1. Stand with your heels right up against a wall.
  2. Have your partner place the paper towel about 30 centimeters in front of your toes.
  3. Try and bend down WITHOUT BENDING YOUR KNEES and pick up the paper towel. PARTNER: Be ready to help keep experimenter from falling!

What Happened?

  1. Now stand about 60 centimeters away from the wall, and repeat the experiment with the paper towel.

What happened this time?


Classic Slime!

Parents: Read through this before performing this experiment!

Purpose

To create a fun-to-play with polymer

Materials

  • Bowl
  • 2 400ml Beakers (or 2 glasses/cups/empty jars of equal size)
  • Spoon
  • White Glue
  • Borax
  • Water
  • Food Coloring
  • Zip-lock style plastic bag
  • Funnel (optional)

Procedure

  1. Fill one beaker about halfway with glue. Add water until the beaker is nearly full, and gently stir until the water and glue are thoroughly mixed.
  2. Add 4 or 5 drops of food coloring to the glue/water mixture and stir until the color is evenly distributed.
  3. Pour your colored glue mixture into the bowl.
  4. Fill the other beaker halfway with water. Add 4 heaping spoonfuls of Borax and stir gently until the water looks gray. Some Borax will settle onto the bottom of the beaker. That's fine. Pour the gray water into the colored glue, being careful not to let the Borax that is still powdered plop in. Stir the contents of the bowl and watch what happens!
  5. After gently but thoroughly stirring the glue/borax mixture, pick up the bowl and using your fingers as a strainer, pour the liquid portion back into one of the beakers while leaving just the gooey blob in the bowl.
  6. Pick up the gooey blob and squeeze & squish it (use the same motion as if you were making a snowball). In a few moments, the wetness will disappear, leaving you with a cool ball of colored slime! Stretch it! Roll it! Bounce it! It's awesome!
  7. Store your slime in the plastic bag when not in use.

Try This!

Put a funnel into one of the beakers (or an empty jar, if you don't have a beaker). Roll the slime into a nice, round ball and plop the ball into the funnel. Observe the funnel/slime setup every ten minutes or so. Does anything change?

What's Going On?

Mixing with Borax causes the glue to polymerize, or convert into an amorphous ("shape changing") solid. Since this is a chemical change, the slime cannot be converted back into glue.

Caution: Do not leave slime on carpets, furniture or anything made of cloth, as it may stain such items. Only play with it on hard, smooth surfaces! Hot water will dissolve hardened slime.


Lift Heavy with Light!

Get These Materials Ready

  • Marble*
  • Ball of Clay, larger & heavier than the marble
  • Empty Spool or an empty toilet/paper towel roll (you'll need a longer string if you use a paper towel roll)
  • String, about 12 inches long (longer can be hazardous)
  • Tape

* If you don't have a marble handy, the experiment can also be performed with two balls of clay; one smaller, one larger.

Do These Steps

  1. Tape one end of the string to the marble (use plenty of tape to make sure it's secure).
  2. Thread the string through the spool, and then attach (using tape if necessary) the other end of the string to the ball of clay.

READ THIS, then TRY IT

Even though the clay ball is heavier than the marble, you can use the marble to support the ball by holding the spool and spinning the marble around like a lasso. Practice lifting the clay ball by "marble spin power". Can you make the clay ball stay at a constant height? Try it!


Split a Penny in Twain!

Use your head when doing this experiment. An ounce of prevention and all that.

1. File off the edge of a 1982 or later penny. You'll see the silvery zinc underneath. Drop the filed penny into a small glass with hydrochloric acid in it (get some Muriatic acid from the paint store - it's something like 37% HCl). BE CAREFUL with this stuff, it's very caustic.

2. You'll see the penny bubbling away as the zinc and HCl react. The copper won't react with the HCl, however. Let the penny bubble until it stops (mine took about 90 minutes). Run the water in your sink at full blast and SLOWLY decant the acid out of the glass and into the sink. Use a metal strainer if you can't pour slowly enough to prevent your penny-copper-foils from pouring out. DON'T add water to your acid in the glass. That's bad.

3. Rinse the penny foils thoroughly and check them out! COOL!


Crackling, Crowing Cup!

Objective

To amplify sound waves using very simple equipment.

Materials

  • Paper Cup
  • Push Pin
  • String
  • Paper clip
  • Water
  • Paper Towel

Procedure - The "Easy" Part

  1. Use the push pin to poke a hole in the bottom of the cup. Make the hole big enough to thread the string through the hole.
  2. Thread the string through the cup. Tie the paperclip to the end of the string on the outside of the cup, so that when you pull the string through, the paper clip will be on the bottom of the cup.
  3. Fold your paper towel so that it's a rectangle about 2 inches by 1 inch (very approximate is fine).
  4. Wet the paper towel with water and squeeze most of the moisture out.

Procedure - The "Tricky" Part

  1. Hold the cup upside down in one hand, with the string dangling down towards the floor. Hold the damp paper towel in the other hand.
  2. Firmly grasp the string with the damp paper towel. Jerk the paper towel down the string, so that the paper towel slips along the string. If no sound is produced, dampen the paper towel a bit more and try again. With practice, you'll get that string howling!

What's Going On?

What we're doing here is amplifying sound—producing the sound the string would make anyway, but making it louder. All sound comes from vibration. Here, the string is vibrating, and that gets the air inside the cup vibrating. The shape of the cup helps to amplify the sound. HONK!

Think and Talk About This

Different materials can do a better job of amplifying sound waves. What do you think would happen if you tried this experiment at home with a tin can instead of a paper cup? Try it with Mom/Dad's help!


I Hear a Hanger!

Objective

To observe (with your ears) the difference in sound transmission in air and in a solid object (like your head).

Materials

  1. Metal hanger
  2. Two pieces of string (about 18 inches or so—longer is better than shorter)

Procedure

  1. Tie the strings to each "corner" of the hanger, as shown.
  2. Carefully wind each of the strings tied to the hanger around each of your index fingers. The hanger should be hanging from your fingers so that you can swing the hanger into a chair or table (If you're standing with elbows bent at 90 degrees, the hanger should be hanging at waist or knee level).
  3. Gently swing the hanger into a chair or table, and listen to the sound it makes.
  4. Next, put your index fingers in your ears, and repeat step 3. Does it sound different?

What's Going On?

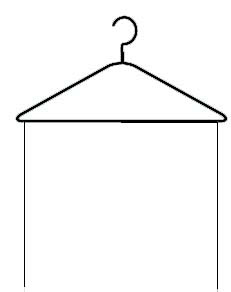
Sound is a form of mechanical energy, and travels in waves. Waves of sound, however, must travel through something in order to be heard (sound cannot travel through a vacuum). Sound travels much better through a solid (like your head) than it does through a gas (like the air).

Think and Talk About This

Do you think changing what the hanger is made of will change the result? Try it with a plastic or wooden hanger.


An Egg-cellent Eggs-periment!

Objective

To make an egg float in water and explore the concept of density

Materials

  • Beaker or other container (a cup works just fine)
  • Water
  • Salt
  • Egg
  • Spoon

Procedure

  1. Fill the beaker with 250 ml of water (fill your cup about 3/4).
  2. PREDICT: What will happen when you carefully drop the egg into the water? Will it sink or float?
  3. Carefully drop the egg into the water. What happens? Was your prediction correct?
  4. Remove the egg. Add 2 spoons of salt to the beaker.
  5. GENTLY stir with the regular spoon to help dissolve the salt. Gently replace the egg.

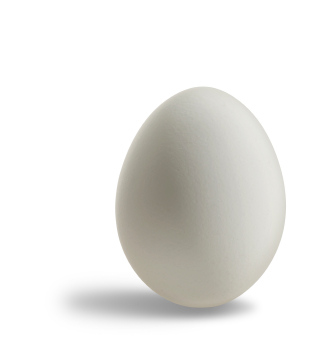
Does the egg float? If yes, congratulations! If no, repeat steps 4 & 5 until the egg floats.

What's Going On?

As the salt dissolves in the water, the water's density increases. At first, the egg is more dense than the water, so the egg sinks. Adding salt makes the water more and more dense. When the water finally becomes more dense than the egg, the egg floats!

Think and Talk About This!

  • What other substances could you dissolve in water to increase its density and float the egg? Get mom or dad's permission and try it out!
  • Do brown eggs have a different density than white eggs? Design and perform an experiment to find out!

Automatic Finger Washer!

Objective

To observe the effects of gravity on two objects of different mass.

Materials

  • 5 Washers
  • 1 Paperlclip (we've found that large paperclips work best)
  • String (about a 2.5 feet long)

Procedure

  1. Stack the washers, thread the string through the hole, and tie them to one end of the string. Pow!Science! recommends at least a double knot. Maybe triple.
  2. Tie the paperclip to the other end of the string
  3. Parents and kids will most likely have to work together to complete the experiment from this point. Not-so-tall folks may experience better results if they stand on a chair.
  4. Standing up and giving yourself some space, point an index finger straight out, parallel to the floor, or even slightly up. Hang the washers over this finger so that they only hang down a few inches from your hand. Hold the paperclip with the other hand so that the rest of the string is also parallel to the floor.
  5. Release the paperclip!

What's Going On?

Gravity pulls the washers down, and the string pulls the paperclip sideways—but gravity also pulls the paperclip down—so its sideways motion is combined with its downward motion!

Think and Talk About This

Would objects with different weights (on either end of the string make a difference in this experiment? Try it at home and find out!


Cool Paper Cutting Experiment!

Purpose

To observe a physical change by using a Paper Chain

Materials

  • Lined notebook paper (not loose leaf - it can't have holes in it)
  • Scissors

Procedure

  1. Fold the paper in half lengthwise, perpendicular to the lines as shown in picture 1 below.
  2. Look at picture 2 and find the points labeled A and B on your paper. Cut across the folds at points A and B as shown. Be sure to stop cutting about a quarter of an inch away from the open edge!
  3. Alternating between the open edge and the folded edge, cut along every other printed line on the paper. Make sure to stop cutting a quarter inch from the edge each time.
  4. Make your final cut as in picture 3, cutting along the folded edge, but leaving the folds uncut at points A and B as shown.
  5. Carefully stretch the paper open.

What's Going On?

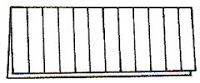
You've simply changed the shape of the paper in a clever way. It's still paper, though, isn't it?

Think and talk about this!

Physical changes don't produce a new substance. Chemical changes do. How could you chemically change the paper?


Valentine's Day Glitter Fizzies

Because Love is never an exact science!

Super Easy Ingredients

  • Baking Soda
  • Citric Acid Crystals
  • Red Glitter (optional, but so romantic!)
  • Red Food Coloring (also optional, but quit taking all the fun out of it!!)
  • Water

Super Easy Instructions

  1. In a bowl, combine 2 parts Baking Soda to 1 Part Citric Acid Crystals.
  2. Add enough red food coloring to make the mixture pink (Tip for coloring baking soda: put in a sealed container with food coloring and SHAKE SHAKE SHAKE!)
  3. Stir in water a little at a time until you get a a pasty consistency. Some fizzing will occur as you mix the water in with the baking soda & citric acid mixture. That's normal! If you add too much water and it's too moist, just add a little more baking soda!
  4. When you have a pasty mix that's not too moist, roll into balls and let 'em set. They'll harden in less than 20 minutes!

These are great fun to drop into a beaker of water and observe the crazy fizzing or to add some freshness and fun to a bath!


How to Adapt your Modern Orange Hot Wheels Straight Track to the HW Workshop Rocket Launcher Accessory!

If you're like me, you were excited to see the "Track Builder" Rocket Launcher Accessory - it's a neat gadget that attaches to your track: when a car speeds through the gate, ~POW!~ (pun intended) the Rocket Launches. Neat! Well, almost. I was shocked to learn that "modern" Hot Wheels Orange Straight Track (typically sold by the piece, about 21 inches long) is not "out of the box" compatible with the Rocket Launcher Accessory!

That's terrible! Mattel has been making Hot Wheels Track for decades, and though designs have changed slightly, they've always kept it compatible. In other words, Track Pieces, Loops, Curves from the original 1960s Redline series all fit with the Track Pieces, Loops, and Curves manufactured today. Even the Super Chargers are 100% compatible, regardless of when they were manufactured. Now enter "Hot Wheels Workshop Track Builder" accessories - not compatible with the track pieces I've been collecting and using for years?

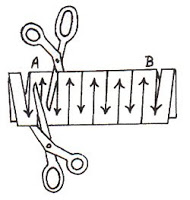
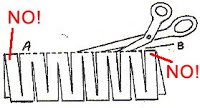
I say nonsense! Luckily, there is a VERY easy work-around to make your current Straight Track 100% compatible with the Workshop Track Builder Accessories such as the Rocket Launcher and the Triple Blast Alley. The following pictures chronicle both the problem and the easy solution.

The Problem

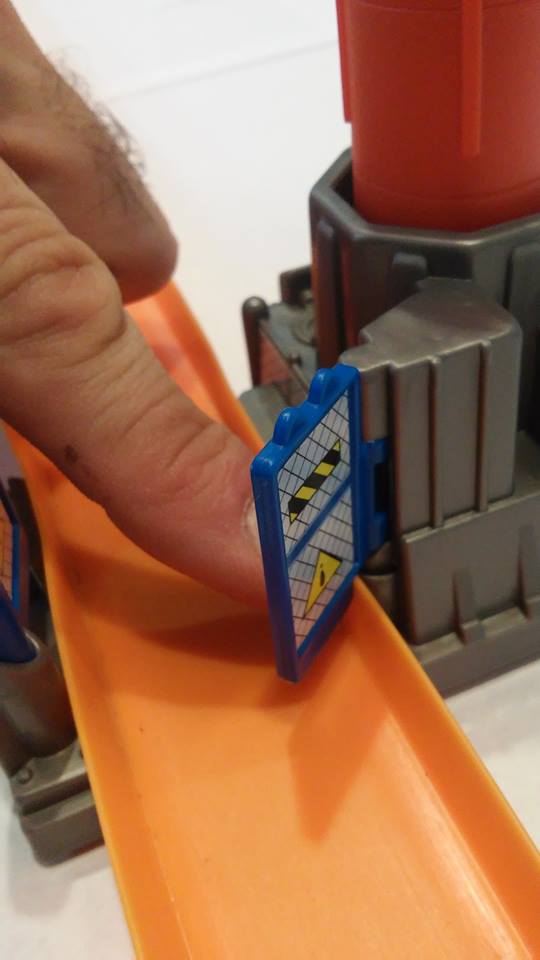
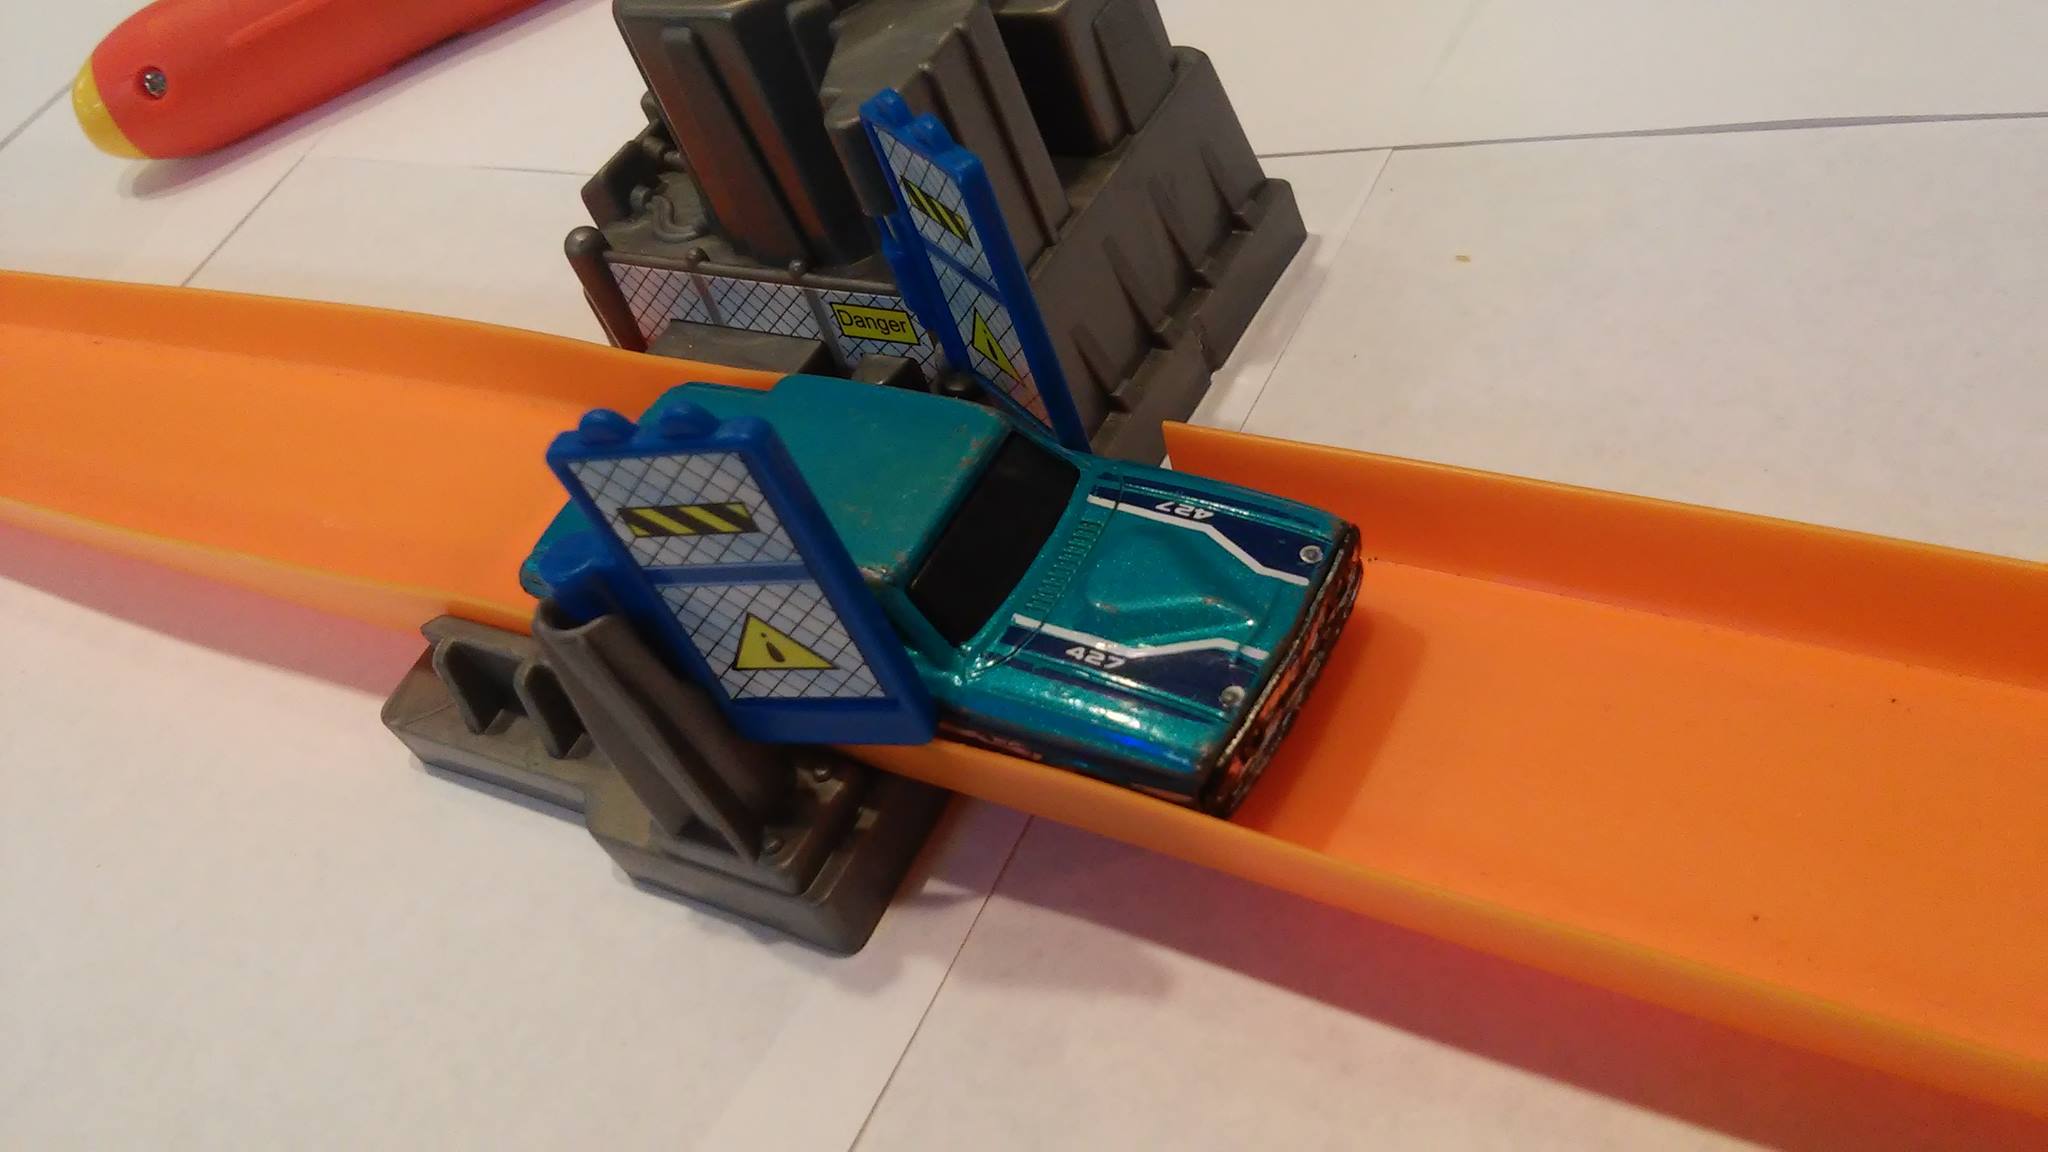
As you can see in the picture above, when the door that launches the rocket is pushed open, if you've installed a modern piece of 21 inch straight track, the door will push against the sidewall and will not swing open fully. The rocket will launch, but the car will crash to a halt every time. No fun!

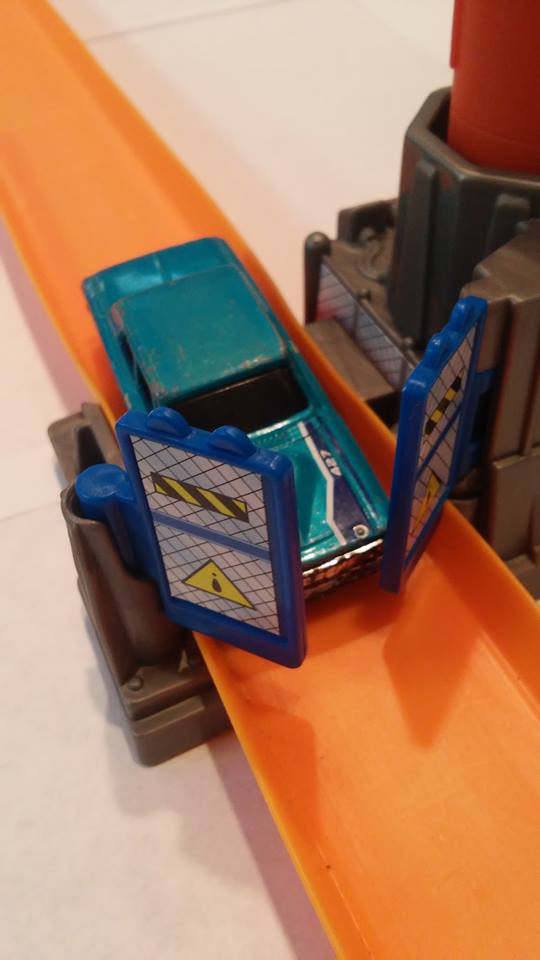
Oh no! As described, this car crashes into the gates, launches the rocket, but slams to a halt, unable to pass through the gate.

The Workaround

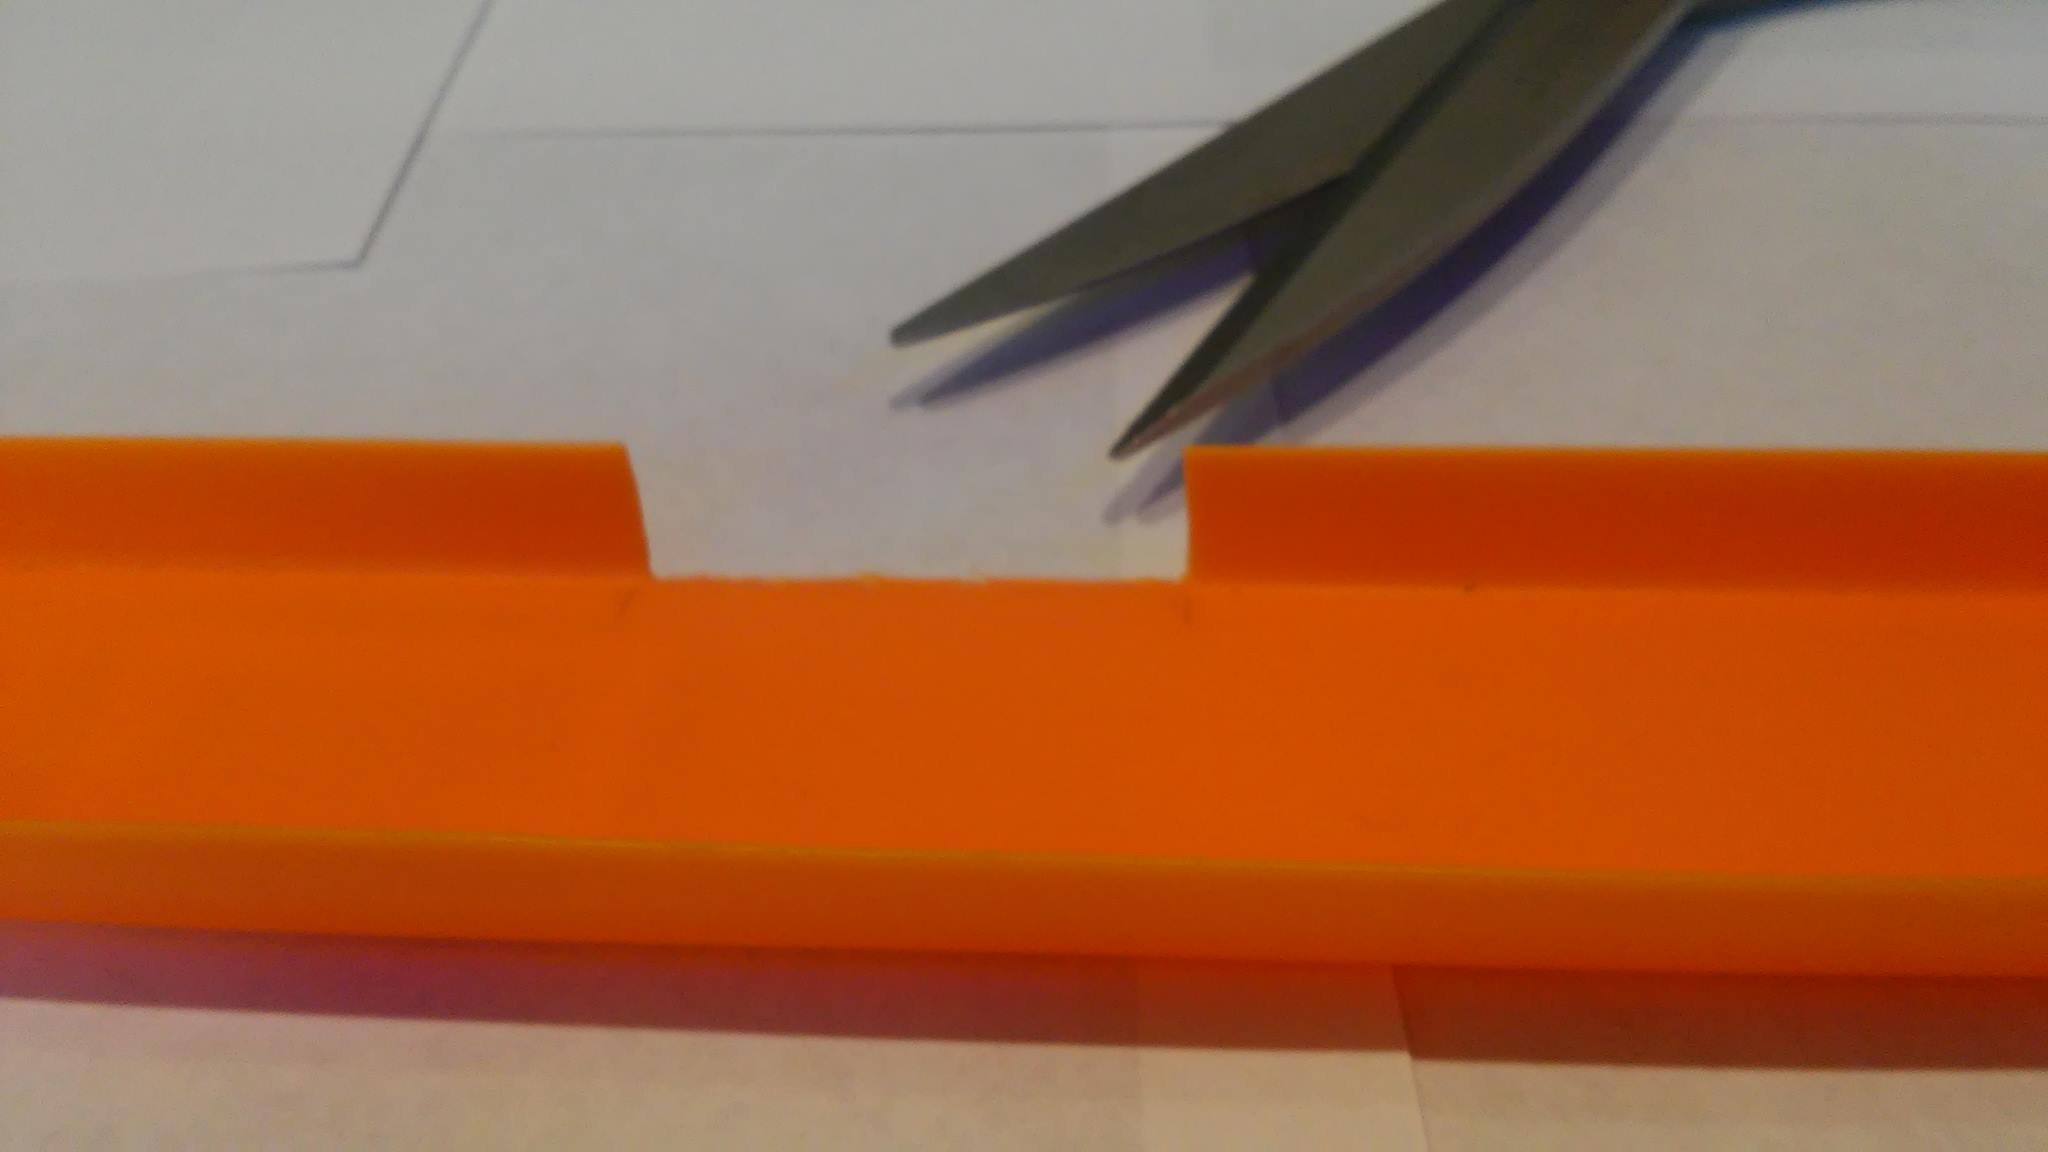
Using a sturdy pair of scissors, I cut away about an inch of sidewall on my straight track.

With the sidewall trimmed, the door opens fully and the car passes through, launching the rocket and continuing on its way. Hooray!

Conclusion

I enjoy building elaborate Hot Wheels layouts and do enjoy incorporating these "Track Builder" accessories into my layouts - but I think it's a grave error on Mattel's part to introduce a 2nd type of track into a system that has remained compatible and consistent since being introduced in the 1960s, effectively alienating the collecting/building community.

As a toy store owner, my issue is this: I have no problem trimming a piece of straight track to be compatible with the Rocket Launcher accessory - but I can't expect laymen and/or customers to be willing to do that. It also brings up the "Oh, never mind all of that track you've been collecting for years - now you have to re-do all of your layouts in the 'Track Builder' system." No way. Not this Hot Wheels enthusiast.


How Long is a Minute? An Easy Activity to Develop a Sense of Time

Many kids, including myself when I was young, have very little concept of time or sense of its passing–or at least, not a very well developed sense. I remember my dad asking me to estimate minutes during a car ride as a young nerd…about 6 or 7 years old. I was counting off minutes about every 3 or 4 seconds. Instead of helping me out, Dad pretty much just had a good laugh and drove on.

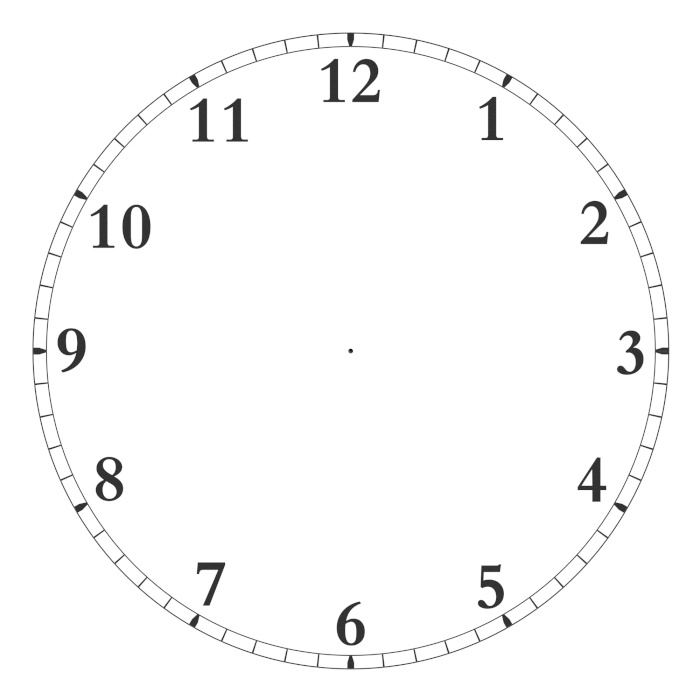
My 3rd Grade Teacher, Mrs. Churchill, helped us develop a sense of time with a stunningly simple activity. She told us to just sit there with our eyes closed and wait…for one minute. When we thought a minute had elapsed, we should raise our hand. We all low-balled it during our first several attempts, but after not all that many trials, we actually started putting our hands up around the 45 or 50 second mark, maybe the 55 second mark if we were really counting well in our heads. Once I even waited too long and she rang the “minute’s up!” bell before I’d even raised my hand. Sheepishly, I shot it up right at the bell, hoping I’d be lauded as a true master of time….the only one who nailed the minute right to the split-second. Mrs. Churchill was not fooled. But she did teach us how to estimate a minute fairly accurately, and to respect what a fairly large amount of time a minute really is. She had it way up on Dad!

If you’re trying to get your kids to understand time a little bit better, give this activity a try!

Please accept cookies to help us improve this website Is this OK? Yes No More on cookies »